![]() Resizing a Fence
Resizing a Fence
| 1. | To change the size of a fence section, place the mouse pointer on any of the posts (represented by diamond-shaped grips at the end of a fence section or in a corner where two sections come together), and then press and hold the left mouse button. |
| 2. | While holding the left mouse button, drag the grip to the new location. When the desired location has been reached, release the left mouse button. |
Tip: As the post is being moved, the dimensions of the affected fence section(s) will be displayed on the grid.
![]() To modify a fence in the design:
To modify a fence in the design:
| 1. | Click the Modify button in the Home Ribbon. |
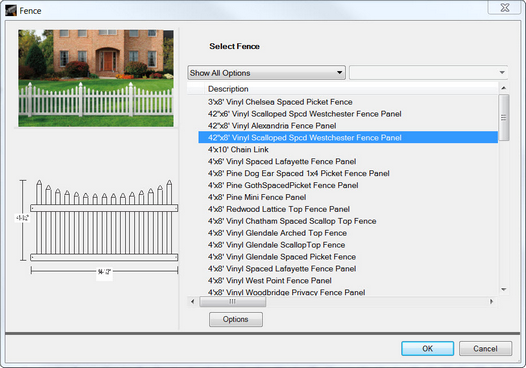
| 2. | Choose Fence from the menu. The mouse pointer will be displayed as a hand when placed over a fence section. Locate the desired fence section, place the mouse pointer on the fence section and press the left mouse button once, which will display the Fence Properties dialog. |
| 3. | From the Fence Properties dialog, you can perform the following actions: |
| a. | The fence style can be changed by choosing a new style from the list on the right-hand side of the dialog. |
| b. | Construction options can be changed by clicking the Options button in the dialog. This will display the Material Options dialog, which is used to select options for the fence section |
| 4. | Once the desired changes have been made in the Material Options dialog, click OK to return to the Fence Properties dialog. |
| 5. | In the Fence Properties dialog, click OK to return to the fence design. |
![]() To remove a fence from the project:
To remove a fence from the project:
| 1. | Click the Remove button in the Home ribbon. |
| 2. | Choose Fence from the menu. The mouse pointer will be displayed as a hand when placed over a fence section. Locate the fence section to be removed and click the fence section to remove it. |
| 3. | Repeat steps 1 and 2 to remove additional fence sections. |
