The default workspace layout consists of the following main areas:
Top:
Mini-toolbar: Provides access to Save (Ctrl + S), Undo (Ctrl + Z) and Redo (Ctrl + Y) functions.
Design Button: Provides access to commands for saving, printing and managing deck design projects.
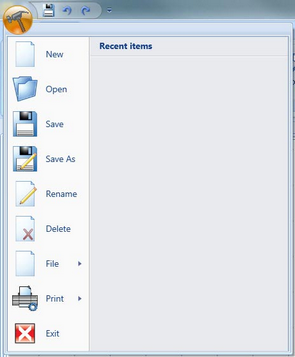
| • | New: Starts a new design session. |
| • | Open: Opens an existing design. |
| • | Save: Saves the current design. |
| • | Save As: Saves the current design with a different filename. |
| • | Rename: Used for renaming an existing design. |
| • | Delete: Used for deleting an existing design. |
Open Project: Displays the Project Browser, to select a project from one of the pre-designed projects. |
Save Project: Allows a deck design to be accessed from the Project Browser |
All: Allows printing of all pages that are available |
Print Preview: This option display all drawings, bill of materials, and design information. |
| • | Exit: Closes the designer. |
| Home Ribbon Menus: The ribbon menus provide shortcuts to common tasks performed while creating a project. The content of the ribbon menus will change depending on the active view, as well as the design elements that are currently in use within the project. Button names and basic information about functionality for a button can be displayed by placing the mouse pointer over the button. |

Design - 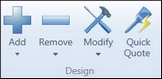 Design: Includes the Add, Remove, Modify and Quick Quote buttons Design: Includes the Add, Remove, Modify and Quick Quote buttons |
|
||||||||||||||||
|
||||||||||||||||
|
||||||||||||||||
|

- Includes the Design Wizard and allows the user to follow specific guided steps to add components to the design |
Zoom - 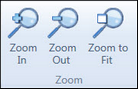 |
|
||||||||||
|
||||||||||

|

 |
|
||
|

Fence - Select the Material for next Fence added |
Gate - Select the Material for next Gate added |
Theme - Set Color Theme |
3D Settings - Set 3D Rendering method and parameters |

|
| Help - |
Help - Displays online help |
About - Displays the About dialog which contains information about the program version and copyright information. |
|
|